 So far in this article series, we have looked at what you should be taking photos of and what to take them with. Now we are going to take a closer look at where you should be taking your photos and provide tips for making them look even better.
The Exterior Shot
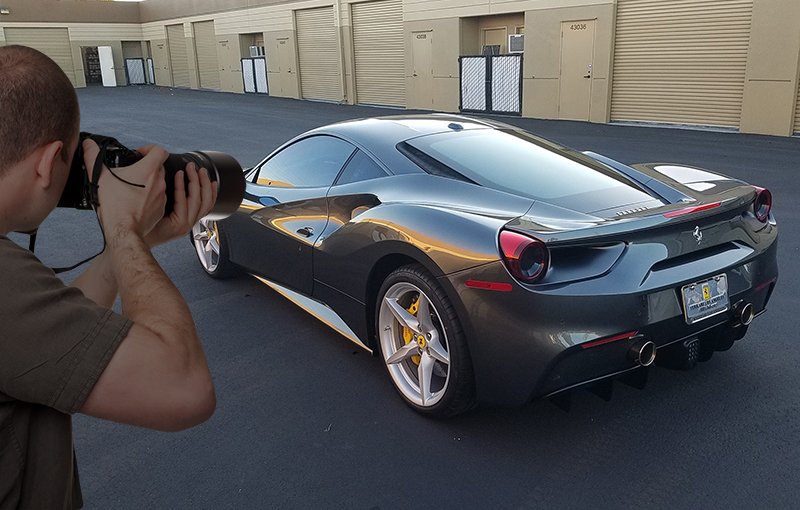
In the first article, we talked about the different photographs you should be taking of the vehicles you work on. One of the photos you need, regardless of which type of post you are submitting, is the exterior of the vehicle. The exterior shot is important because it is what the processors at 1sixty8 media use as the featured image for your posts. Having the exterior of the vehicle as the featured image serves to catch the eyes of owners of that vehicle when they visit your page. Once you have their attention, then you can show them why they should visit your facility.
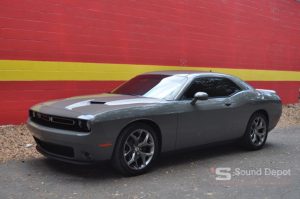
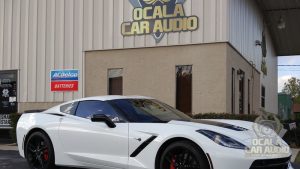
Some of the best exterior photographs we see are taken outside. A few 1sixty8 media clients have their shop names and logos painted on exterior walls of their buildings. They capitalize on this by pulling a vehicle in front of the logo and taking the photograph there. This is a great idea because it not only builds your brand, but subliminally positions that type of vehicle with your logo and forms a connection between the two.
Some shops might not be able to paint a logo or have a logo on a sign in a spot convenient for picture-taking. If you are one of those, we suggest looking for a spot somewhere against a bare wall to take your
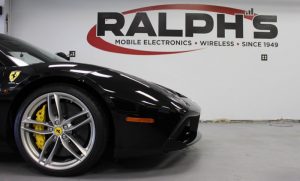
vehicle-exterior photos. That’s because we want to minimize distractions to the viewer. We want the focal point to be the car. If you take a picture of the car in a parking lot with five other cars, it will be harder for a potential client to make out their vehicle model in the photo.
If you have a facility with a larger bay area, and it is clean, organized and well-lit, that can certainly be an option for the exterior shot as well.
Exterior Lighting
The next suggestion we have will take a little pre-planning. If you have ever taken a photograph, you know lighting can make or break your photos. Nothing changes when taking a photo of a vehicle – lighting is still critical.
To get the best exterior shots of vehicles you work on, we suggest scouting out your planned photo area at different times of the day to see the difference in lighting. Typically, early morning or early evening/later afternoon are going to be the better times. There is a sweet spot of not too much light to cause shadows or bright spots, and just enough to see the vehicle.
We know the realities of life in the bay. You aren’t always going to have the luxury of taking a photograph of a vehicle at the perfect time(s). That’s OK, but if you do have the vehicle during those times, take advantage of it.
Interior Shots
We have addressed the easy part of webpage post photographs: the exterior of the vehicle. Now we move onto the trickier part: the interior shots. Sometimes it is difficult to get a good shot of something in a vehicle. We encourage you to do your best and keep experimenting. Here are some tips that can help you to overcome some of the interior photography challenges.
- Have good bay lighting – This make sense for not only taking photographs, but helping your technicians see what they are doing more easily. Lighting is a cost-effective upgrade for a bay.
- Watch out for glare – Glare in photos is a difficult challenge. We are often taking a photograph of a radio that has a 7” reflective surface. Getting a good photo of that might take some experimentation. If the light causing the reflection is coming through the vehicle glass, try covering up the offending piece of glass with a towel. Sometimes something as simple as that can make all the difference in the world.
 A deeper depth of field (smaller aperture opening) results in a distracting background, and also a darker shot.
 Using a larger aperture helps force the focus on the subject matter and also captures more light.
Watch for things in the background – When taking photos, push yourself to look at not only the item you are photographing, but what else shows up behind and around it. If you are taking a photo of a hands-free microphone mounted near the headliner of a car, look at the surroundings that are visible through the windshield. Just like with exterior shots, we don’t want our interior shots to be too busy. If your microphone photo has a background of your whole wall of dash kits, you might want to take the photo from a different angle to reduce the distractions. If you’re using a DSLR camera, you can easily do this by reducing the depth of field –using a larger aperture setting. The shallower depth of field will slightly blur everything in the background, resulting on more focus for your subject.Be sure to clear away those cans, bottles and day-old fast-food bags from your counters if they show up in photographs!
- Use a shop light, not a flash – We mentioned before that we don’t recommend using a flash when taking pictures of or in vehicles. That is not to say that we don’t recommend ancillary lighting. The easiest way to augment lighting in a vehicle is by using a tool everyone has in their bays: a shop light. Using a shop light and spending a few seconds playing with positioning it can yield great results. Keep in mind that sometimes the best direction to point the light might be opposite from the item you are photographing. Indirect, reflected light works best most of the time because it is more diffused (softer).
-
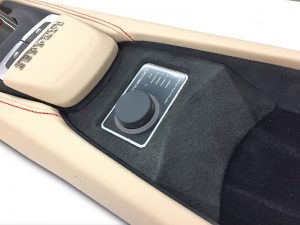
Pictures that capture the detail in some build aspects aren’t necessarily possible inside the car. If you have the piece out of the car, make the most of it! Take photos of pieces outside the vehicle, when possible – If your technicians are installing a tricky DSP controller in a center console, the console probably has been removed from the vehicle. That is a great opportunity to take a photograph of the part in a better lighting environment. It will take a little forethought to take the photographs before the pieces are installed back in the vehicle. The benefit, though, is you are able to take the photos in better lighting and from any angle you want.
The concept of this series of articles was not to provide comprehensive instructions for how to photograph vehicles and the work done to them. The idea was to give you a few tips, tricks and ideas to steer you on your way to taking better photographs next week than you did last week. We hope you enjoyed them. Let us know if you would like more articles like these in the future.
Leave a Reply